What have you learnt about technologies from the process of constructing this product?
Digitisation
It has been voiced by theorists that digitisation gives Indies an equal chance of success, however throughout the simple example of Paul's Facebook page which was multiplied in many different languages, this is shown to be questionable. However an example that fits with this opinion is Harry Macqueen's feature film Hinterland which received limited cinematic release using poorer quality cameras, and Corrie Greenop's film The wandering rose which was created on a budget not even close to 1/4 of a Working Titles production budget and the successful film Monsters crew and cast fit into one car.
Below I will explain how this technology helped me and how I developed.
My use of photoshop
Recording hardware
We used:
DSLR camera-

 Before media I had never used a proper recording camera before so I had to learn the different aspects of it, I developed my skills mostly through trial and error during my prelim and Sweede. We used this for every part of filming within our film opening. It gave us very professional quality and aloud me to play around with the depth of field to create atmospheric shots e.g the candle.
 SD card-
 Again I had never transferred material from an SD card to a computer let alone Final cut pro X, so this also was a new but simple experience. After some guidance I quickly became confident in this, quick and easy way of transferring data. It sped the process along as it was so simple and efficient.
 Tripod-
 This was a very simple but vital piece of equipment as it ensured that all our shots were steady and smooth. It was the first time that I had used one but as it was so simple it needed no explaining. If we hadn't used a tripod we would have had to film handheld, which however is a faster method of filming it is likely to lead to shaky shots which if not intended can ruin the professional look of a piece and lead to more editing to remove and stabilise the movement. Therefore it also helped to speed up the process as it cut the time we spent editing, removing the movement in shots.
Boom mic
 We used this to record the voice overs and outside diagetic music. This was the first time I had seen or used one so I needed to be instructed on how to use it and I also developed through trial and error as I, when recording Hollie's voice over, held the mic way too close to Lucy's mouth thinking it would help pick up the dialogue however it reduced the sound quality. So I re-recorded it with the mic further away and slightly above her and this greatly helped increase the sound quality. The boom mic was very useful when recording outside ambient sound to add to the out-ro as it picked up background noise in incredible clarity and therefore helped us to achieve realism in this scene.
  Garage band-
We used this to help create our soundtrack for the shop scene and bad boy scene. We had never used it before. We first learned the basics and then developed by testing out different instruments, genres and effects. We wanted more of a rock feel to the bad boy scene to help anchor his rebel characteristics, so we tried many different genres of music and ended up using an indie rock effect alongside some different drum effects, to add a beat. For the shop scene we wanted it to be lighter so we added symbols instead of a drum beat to help with the rom-com aspect. Using this helped us as we didn't need to spend time organising a recording studio and musicians therefore speeding up the process and it was very simple and quick.
Final cut pro X-
 |
| basic tools |
 |
| bedroom scene |
 |
| speed altering tools |
We sped up shots in the bad boy scene to help fit with the fast paced editing which we cut to fit with the music. This helped to fit with a more youth friendly style of editing as it made it more exiting due to it being quick paced with a wide range of shots. Therefore this tool helped us to fit our films aim to appeal to our youthful target audience. The hold tool helped me to eventuate a significant moment in the classroom scene. The two shots its self already connotes a romantic relationship but when Harri glances at Hollie this anchors this romance so it needed to be clearly seen. This take however was too shot due to a malfunction with the tripod which made the shot shaky and as we had limited filming time with our actors there was no time to re-shoot. Therefore had to edit out the shakiness and I tried first to slow the shot down but the slow-motion effect looked odd therefore I then paused the shot using the hold the shot, making up for the time that had to be removed, as the take had to be long enough for it to be made significant. I also used the stabilising tool which helps to reduce movement within the shot. This therefore these tool helped us to clearly connote our romantic genre.
 |
| classroom scene |
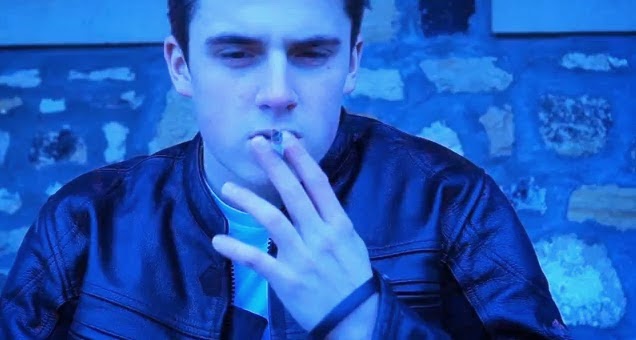 |
| Original blue coloration |
 |
| duller sepia effect |
At first the shop scene was too dull and we decided to edit it in the style of a music video to help signify our rom-com genre like seen in Wildchild as it is faster paced and therefore more appealing to our youthful target audience. So we incorporated a mixture of fades and transitions to make it more glamourous. This therefore helped us to appeal to our target audience and signify our genre. However not all of our experiments with transitions made it into our final cut.
 |
| an example of a transition that we tried |
The most helpful tool was the speed tools as they helped us to fit the pace of shots to our chosen editing pace and to cut shots to the music and therefore helped to signify the genre and target audience if our film.
Our use of technology helped us to:
Share posts
 |
| an example of one of Ben's posts that I shared |
Feedback
We received feedback in many different forms. For example we received it through, email, commenting on blog posts, verbally, in a written format on paper and using the youtube annotation tool on rough cuts. This really helped us develop our film as using these many forms of communications it was made clear what needed to be improved and worked upon.

Facebook-
 |
| feedback from a friend via Facebook |
We used Facebook messenger to communicate as a group. It was very useful when organising shooting and generally discussing ideas or aspects of pre-production, production, and post-production. Made the whole process quicker and simpler.
Blogger
 |
| example of links list |
It aloud us to:
- add links to posts to help us evidence our research
- add photos and film clips
- change colour, font and size of texts to help us organise our work by creating headings that stand our and highlighting terminology which helps us evidence our knowledge
- post story boards, call sheets and screen play which helped us evidence four preproduction research
- organise work using links lists
 |
| links, colour change, font change and size change have been used |
Youtube
Youtube aloud to easily share our rough cuts and filmed audience feedback. Our YouTube uploads are effectively self-distribution, we can monetize these by simply enabling ads. Also it allows us to quickly embed videos onto our blogs this speeds up the process of moving files using a memory stick which I had previously used before.

Conclusion
This has taught be how to create a movie and that it is possible using the technology provided. It shows me that I could produce a film much like Le Donk and Scor-zay-zee and Colin, these were both produced by Indie companies using micro budgets.
I have learned how to use final cut pro, and to develop our film further than we imagined using transition effects, speed tools and editing. I have also developed my skills on garage band and now know what quality is effective and not. We have almost created what we envisioned using this range of technology.


